PIC18F2550 : Blink LED using XC8 Compiler

Welcome to another chapter of PIC18F programming Tutorial. In this chapter we are going to program a simple 28 pin PIC18F2550 microcontroller using mplabx IDE and XC8 Compiler.
The concepts for programming a pic18f2550 microcontroller is still going to be almost same as previous tutorials on pic18f4550 microcontroller, however since pic18f2550 is a different microcontroller in the same pic18F family, so little modification is required with the way it is coded.
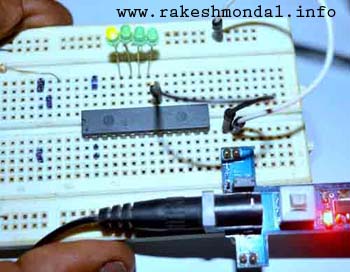
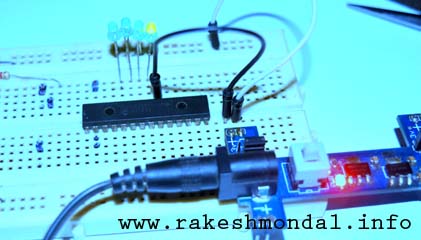
In this tutorial we are going to blink few simple led using pic18f2550. Two source codes are posted here which basically does the same thing, but the motive is to project the various style of coding the same thing in different ways. The method posted here are some of the most common methods for coding a PIC18F2550 microcontroller.
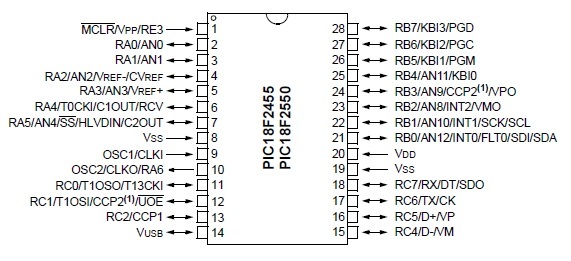
Unlike the traditions c18, here we choose to use the xc8 compiler which happened to be the most recent compiler introduced by microchip. PIC18F2550 is a 28 pin Microcontroller, which also supports USB communication. Always download a copy of pic18F2550 Datasheet from the manufacturer’s website before experimenting with the respective microcontroller.
-Breadboard
-PIC18F2550 Microcontroller
-LED
-IC 7805 (if necessary)

Blinking a led is comparatively is simple, we just have to define the ports output and Set the pins to high or low with enough delay in between the High and low for a visible blink. If the power source for input to microcontroller is more than 5V then add a IC 7805 before proving the Input voltage to avoid damage to the microcontroller.


As mentioned above, that the Source code here is compiled with mplabx ide and XC8 compiler however you can use the traditional c18 compiler as well, if you prefer the old Mplab IDE. The code below blinks the led with delay of few seconds. Without using any predefined delay routines. For delay we would use a simple for loop, the next example shows without using an for loop which is much more simple and short.
/* ****************** 18f2550-blinking-led-1.c ****************** */
#include <stdio.h>
#include <stdlib.h>
#include<p18f2550.h>
#define portb_output TRISB = 0
#define _XTAL_FREQ 2000000
#pragma config PLLDIV = 5
#pragma config CPUDIV = OSC2_PLL3
#pragma config FOSC = INTOSC_HS
#pragma config WDT = OFF
#pragma config LVP = OFF
#pragma config BOR = OFF
#pragma config MCLRE = OFF
#pragma config PWRT = OFF
#pragma config PBADEN = OFF
#pragma config WDT = OFF
void delayz(void)
{
int i, j;
for(i=0;i<3000;i++)
{
for(j=0;j<2;j++)
{ /**Some delay***/ }
}
}
void main(void)
{
portb_output;
while(1)
{
LATBbits.LATB0=1; //RB0 = High
LATBbits.LATB1=1; //RB1 = High
delayz();
LATBbits.LATB0=0; //RB0 = Low
LATBbits.LATB1=0; //RB1 = Low
delayz();
}
}
/* THE END */
Donwnload xc8 project file- Blinking led 1
/* ****************** PIC18F2550-Blinking-led-2.c ****************** */
#include <stdio.h>
#include <stdlib.h>
#include <p18f2550.h>
#define portb_output TRISB = 0
#define _XTAL_FREQ 2000000 //20 for the Delays
#pragma config PLLDIV = 5
#pragma config CPUDIV = OSC2_PLL3
#pragma config FOSC = INTOSC_HS
#pragma config WDT = OFF
#pragma config LVP = OFF
#pragma config BOR = OFF
#pragma config MCLRE = OFF
#pragma config PWRT = OFF
#pragma config PBADEN = OFF
#pragma config WDT = OFF
void main(void)
{
portb_output; // PortB pins Output
while(1)
{
LATB = 0b00000010; __delay_ms(100); // OR PORTB = 0b00000010;
LATB = 0b00000001; __delay_ms(100);
LATB = 0b00000010; __delay_ms(100);
LATB = 0b00000001; __delay_ms(100);
}
}
/* THE END */
Donwnload Blinking LED project -2
Project Files
Project 1
Project 2
Thanks for Reading
Ron

