First Time Programming a Microcontroller

First Time Programming a Microcontroller
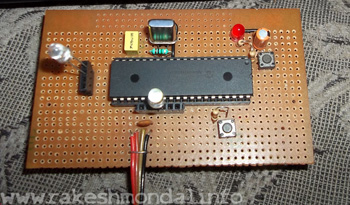
In my previous post we have carried out the construction of the base Circuit board for our USB demo Interface Board.So lets begin with out next part for little but more info about the pic18f USB on PCB. (If wish then you can also review my pic18f4550 tutorial for beginner) . So lets get on with usb board now.
Simply connecting the USB cable from your computer to the USB Interface Board immediately after you complete the soldering won’t make it start working right away. Of-course like any new hardware installation you will need drivers for windows in order it to get detected by the system. I will provide the links for the driver in my coming posts. The drivers are coded by Microchip. And in order for the driver to communicate with the board the chip must be programmed first, with some sort of firmware. The codes for the micro-controllers are written with some special IDE softwares which have their own programming language which is similar to C.
After the code is compiled to respective output , you will need a special hardware to fuse these output code into the chip. Don't worry about coding, I have already done that for you and the download link for compiled code will be provided as promised. Usually the output loaded into the EPROM of the microcontroller is called the firmware. It is loaded into the EPROM of the chip, once the firmware [the output of the IDE ] in loaded into the chip it will detect the board and we have to provide the driver. After we are done with making the board, the next step would be to load it with a firmware !!
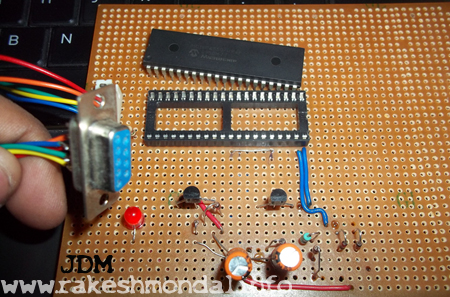
NOTE: Without a base firmware loaded into the microcontroller, the microcontroller will not be detected by the system. So next task is to load a firmware program into the PIC18f4550 which cannot be done with the board that we just prepared. For Beginners, the first time programming of the microcontroller will need an external (Microcontroller programmer ) device like pickit 2 , but as it has to be used once , just once , so at initial stage we will use a cheap alternative, that will be our JDM programmer. Generally if everything goes right then you will need JDM programmer just once i.e the first time loading of the firmware into the chip.
JDM programmer is not so famous but it is easy to make and cheap, so beginners can go with it pretty fine . Once a sample demo firmware is loaded into the microcontroller then later you can update the microcontroller‘s firmware with your own CODE directly from the demo board using a boot-loading software.
PIC18F4550 belongs to www.microchip.com, you can find various resources and interesting materials on their website or you can also check my version of tutorial.
For further steps you need to download microchips MCHPFSUSB framework, from microchip’s website, it contains various examples, driver and some pre compiled demo firmware we need.
Microchip application libraries
There are many versions of MCHPFSUSB which were released later , the version I used for my board was MCHPFSUSB v1.2 , you can download and install it to continue further steps .
you can download it from their website. The links for those download page are here . It will install some packages by default in C:\ drive of your system.
For the 1st time loading you need a base firmware or a demo firmware, The firmware usually comes in .hex format. You can find it here. Copy the string and save it as firmware.hex . We will load this firmware.hex into the microcontroller in later steps.
With the help of JDM programmer (a hardware) and a software we will load firmware into the pic18f4550, In coming posts we will also learn how to Make your own JDM programmer and also a step by step tutorial to load the firmware into chip using a software named winpic800.
The firmware we discussed above can found in your system C:\ Drive after installation of MCHPFSUSB v1.2 framework
C:\MCHPFSUSB\fw\Boot\_output\MCHPUSB.hex
Once this firmware is loaded into the EPROM of your chip then we can connect it with the USB port of your computer and it will detected by your computer. This firmware provided by the microchip.com will be backup/test firmware, after loading this firmware into the chip, if the board behaves the way it supposed to be, then the board is a GO . On later steps we will replace this test firmware with our own coded firmware with a boot-loading software, for our objective with this demo board.
A friend next to me, while making this board asked me a question "why do we need this demo firmware for 1st time programming ?, why can’t we just directly put our coded firmware directly 1st time into the chip". The answer is “yes we can”, we can directly put our complied code into it ( provided if we have the compiled code) but if you are writing your own code then there are certain times while programming the code (in MPLAB IDE) when u have to erase the firmware(.hex) in the EPROM and reload or update again and again to test things , at such situation it becomes kinda helpful.
WHILE EXPERIMENTING WITH YOUR OWN CODE
Specially when you are compiling your own code you have to test it out by loading into the firmware , sometime microcontroller behaves good, sometime it behaves dead(on some mistake with the lines of code). This all process of things goes on while you write your own code. Sometime u may have to reprogram the chip in every few minutes to test it out, at such situation it becomes very handy to have a backup firmware. IF things goes wrong with the code loaded and it is not responding at all (even with the erasing and re-writing on bootloading software) then just pop the pic18f4550 from the demo board then put the microcontroller into you JDM programmer ( that I will explain in my next step about making the JDM programmer ) burn the backup firmware into the pic18f4550, pull the pic18f4550 from the JDM again and put it back to the demo board – and connect it with your computer.
YOU DON’T HAVE TO FOLLOW THIS STEP EVERY TIME FOR LOADING THE FIRMWARE, ONCE THE BASE FIRMWARE IS LOADED INTO THE CHIP YOU CAN UPDATE YOU FIRMWARE DIRECTLY WITH THE demo interface development board with a small bootloading software.
This step is only to be followed in case the code you uploaded has some fault and it is not allowing to put new code into the microcontroller or bootloading software is not detecting the microcontroller at all.
While playing with your own compiled firmware, new firmware can be loaded if the microcontroller is detected by the boot loading software ,it means that the bootloading routines of the firmware is intact which is already present in the microcontroller that you burned into it last time. If it’s not , then use the JDM programmer to burn back the backup firmware and start it all again.
LETS CARRY ON WITH JDM PROGRAMMER now , I will come back to this section with a bit more detail again later , for now heat up you soldering iron again and get a pcb for your JDM programmer .
NEXT STEP >>> HOW TO MAKE A JDM PROGRAMMER
Thanks for Reading
Rakesh Mondal
ron


